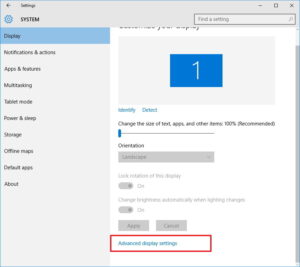
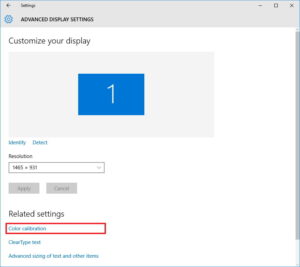
Calibration monitor for Windows1 Use the Windows key + I keyboard shortcut to open the Settings app. 2 Click Display. 3 Click the Advanced display settings link.
4 Make sure you’re using the Recommended screen resolution for your display, and click the Color calibration link to launch the utility.
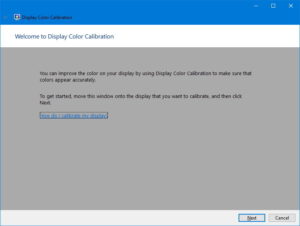
5 Click Next to start the process.
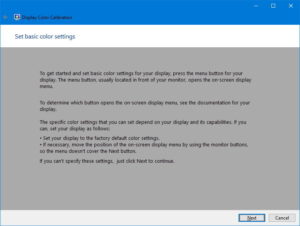
6 The wizard will now walk you through the steps to access the on-screen display menu on your monitor to set specific color settings. Click Next to continue.
7 Click Next again. 8 Adjust the gamma settings by moving the slider up or down until the small dots are barely visible, and click Next.
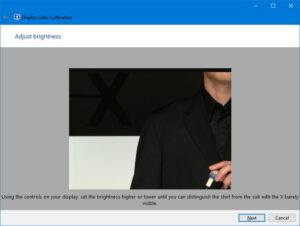
9 Click Next again. 10 Find the brightness controls on your monitor and adjust the brightness higher or lower as described in the image below, and click Next to continue.
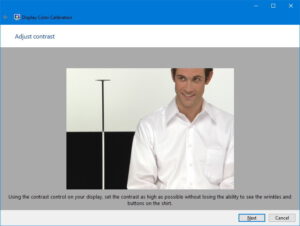
11 Click again 12 Find the contrast controls on your monitor and set it high enough as described in the image below, and click Next to continue.
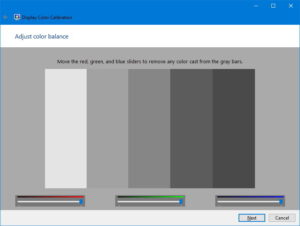
13 Click again. 14 Adjust the color balance by moving the slider for the red, green, and blue colors until removing any color cast from the gray bars, and click Next
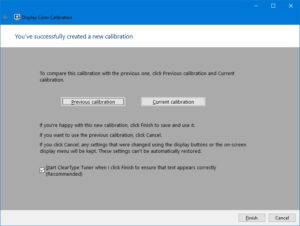
15 Click the Previous calibration or Current calibration button to compare the new changes. If the new color configuration is reasonable, click Finish to apply the settings or Cancel to discard the new configuration.
16 You can skip Cleartype.
|

 .
.